|
My biggest 3D print so far (13.5hrs) It's a decoration piece to create nice light and shadow effects. I'll use it to experiment with LEDs.
I combined 2 scanner RGB leds and programmed some Arduino loops. Together they form a police strobe light. No real flash patterns are used here. It's just a demo. Instructable A recycled scanner rgb led lamp from a broken HP all in one printer, controlled by a Arduino Nano. Instructable I ordered this DIY LED lamp kit from a Chinese web store. They only cost 1 - 1.5 €, it depends a bit on the vendor. It's a nice little kit to build on a free evening, seems to be of reasonable quality, and is useful after building. This lamp was advertised as a 2.4W lamp, that does not seem much, but for a desk lamp it's more than enough. And also important, the light color is good, not too yellow or white. The LIR2032 is a rechargeable lithium coin cell battery. I use them in small robots. For charging I hacked a lithium battery charger circuit board with a TP4056 chip. They are available on the Internet for a very low price. 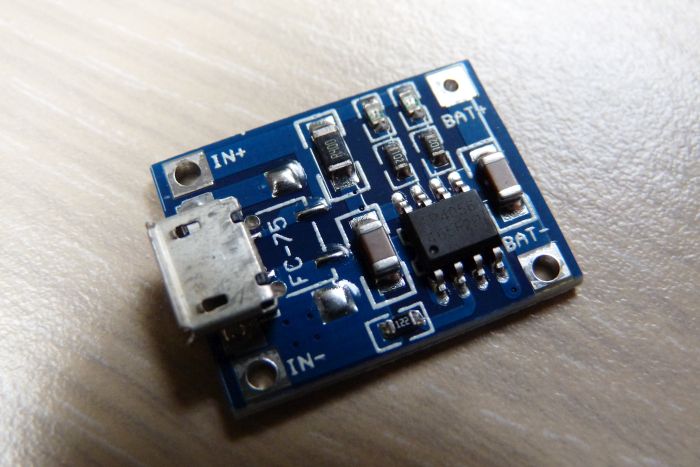 These circuit boards are designed to charge cells at 1A, this is way too much for the LIR2032. Luckily they are easy to modify and obtain a different charging current. In the TP4056 datasheet you can find that R4 is the resistor which determines the charging current. On a new purchased board, you can identify the resistor by it's marking 122 (R4 = 1.2K) 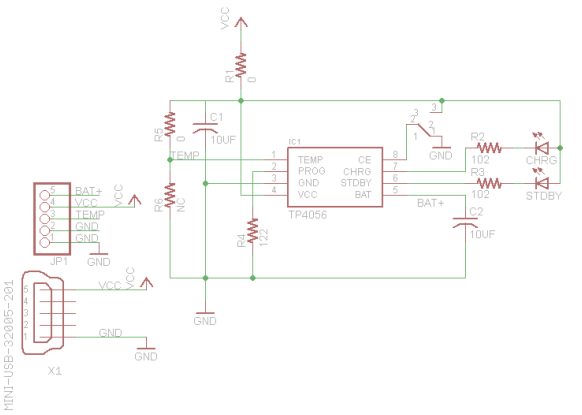 A save charging current for the LIR2032 is 35mA. Also in the datasheet you can find a formula to calculate the replacement resistor for R4: Ibat=(Vprog/Rprog)*1200 (Vprog = 1V) So if you use a 33K resistor for R4 you get about 36mA, that should be good. (resistor marking: 333 or 3302) I changed the resistor, mine was 0603, that's tiny! But this board is also available in different designs with 0805 components, making it a little easier. 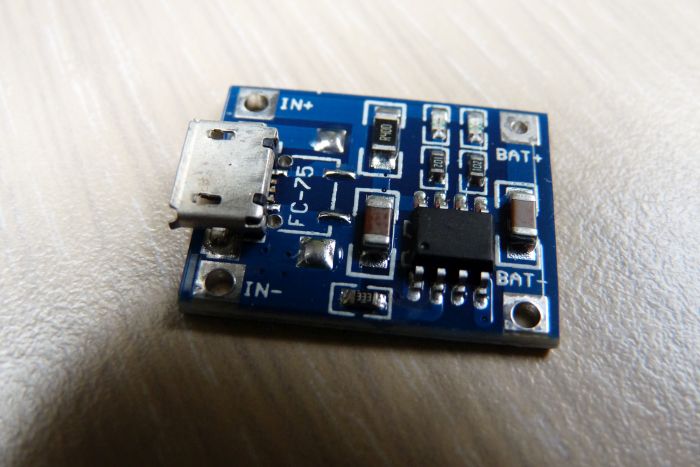 As a last step i soldered a battery holder on a piece of prototype board. You can make this how you want, but keep the polarity in mind. 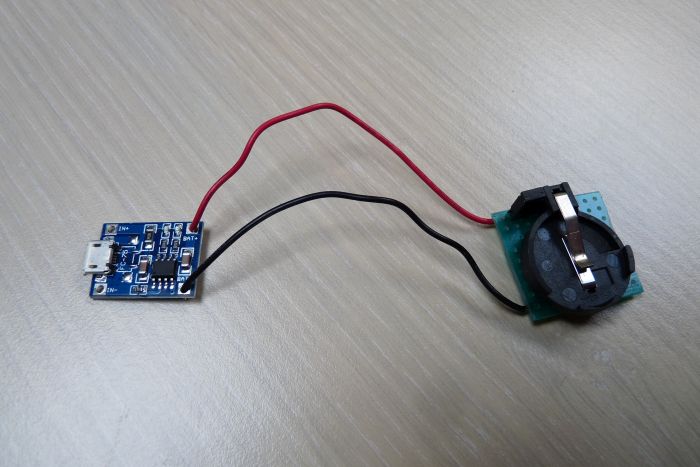 Now you can plug in the mini usb.
When the battery is fully charged, the green LED will light up. A while ago I received a broken air raiders discovery drone to repair. One of the motors did not work anymore. I pulled the little thing apart to do some measurements. It appeared that the PCB still worked perfectly normal, but the engine itself was broken or burned. This is a very basic light seeker circuit, using a analog input of the Attiny to read the difference in light on LDR1 and LDR2. If you build this for a robot, use motors instead of the LEDs and change the "analogWrite" values 0 to something else. For example 50. (I used 0 to see the difference clearly in the video) 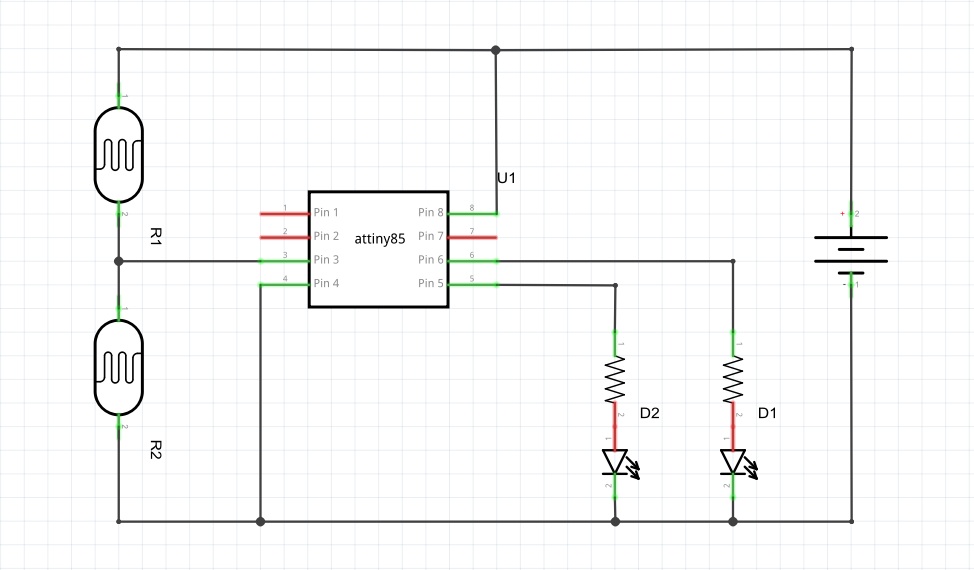 Arduino code:
int led1 = 0; int led2 = 1; int ldr = 2; int light; void setup() { pinMode(led1, OUTPUT); pinMode(led2, OUTPUT); } void loop() { light = analogRead(ldr); if(light<511){analogWrite(led1,0); analogWrite(led2,255);} else{ analogWrite(led1,255); analogWrite(led2,0);} } Finished my DIY arduino mini cnc or plotter. The first test went well. More information on my projects page |


 RSS Feed
